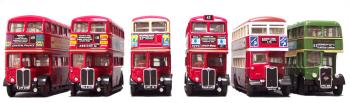
| All
transfers designed by Little Bus Company are authentic image waterslide transfers. This
means that to release them from the backing card will require a small quantity of water. The following illustrations show a step by step
method to refinish an E.F.E. Diecast RT Repainted Model.
The following transfer set used is RTR 25B
destination set from the London Transport series.
The set provides the following options
- A Restricted blind with the bus terminating
at VICTORIA or BECONTREE HEATH or ILFORD BROADWAY
- Or terminating at VICTORIA and changed at a
later date to ILFORD BROADWAY by overlay
|
|
 |
|
 |
|
 |
|
|
|
|
|
| 1. The RTR 25B
transfers come on a card such as this and each of the set blinds are layed out as above |
|
2. Now we take the
model of the RT. |
|
3. Taking a pair of
scissors, make two Vertical cuts, leaving three sections, as above. |
|
|
|
|
|
|
|
|
 |
|
 |
|
|
|
|
|
| 4. Working
Anti-Clockwise around the RT, starting with the Front. |
|
5. Cut the complete
front destination blind (showing 'VICTORIA' as the Ultimate Destination) from the set,
making sure you cut above 'BECONTREE HEATH' and below '25B STRATFORD'. Keep the discarded
ones in a safe place and put the one you are going to use into a saucer of water for a few
seconds. |
|
6. Take the transfer
on the backing card and slide onto the front of the prepared model and position as
required removing surplus water with a small piece of kitchen roll |
|
|
|
|
|
 |
|
 |
|
 |
|
|
|
|
|
| 7. Cut the Side
Destination Screen from the Transfer Set and place in a saucer of water for a few seconds. |
|
8. Take the Transfer
on the backing card and place the Side Destination Blind on the RT as here. |
|
9. Again, repeat Step
5 for the Rear Destination Blind. |
|
|
|
|
|
 |
|
 |
|
 |
|
|
|
|
|
| 10. Take the Transfer
on the backing card as in Step 6 and repeat the task with the Rear Destination as above |
|
11. We can produce a
different Destination Blind by cutting immediately below 'BECONTREE HEATH' and below
'ILFORD BROADWAY' to produce ILFORD BROADWAY as the Final Destination, as here. |
|
12. And Finally we can
produce yet another Destination Blind by cutting immediately above 'BECONTREE HEATH' and
above 'ILFORD BROADWAY' to give BECONTREE HEATH as the Final Destination, as here |
|
Remaining
Destination Blinds, such as the 'BECONTREE HEATH' Screen, can be overlaid to produce
further destinations. For flush fronted RT models, an outline transfer is available.
Standard RT and RTS blinds provide further
options as illustrated in the relevant tutorials. |
|
|